General
List of SharePoint workflow actions
- E-mail Processing
- Documents and folders processing
- List items processing
- Permissions management
- Azure AD Administration
- Administration
- SharePoint Utils
- String Processing Advanced
- String processing (Free)
- Social integration
Installation
Troubleshooting
Community forums
How-to
- Manage workflow credentials with the help of Credentials Manager
- Work with dictionaries, collections and loops
- Create HelpDesk on SharePoint 2013\2016\2019\SE\Online
- Use free string processing workflow actions
- Start SharePoint 2013 Workflows on Selected Items
- Deal with SharePoint 2013 Designer and Workflow Tips, Tricks & Traps
- Generate PDF file from template
- Move documents in current site and cross-site
- Send bulk e-mail with attachments to external users
- Create site by custom template and grant permissions
- Automatically create Microsoft 365 user accounts
- Send periodic expiration email notifications
- Deploy custom workflows with site template
- Change Author field in SharePoint list Item
- How to check-in multiple files
- Copy document set to another library
- How to copy list item with attachments across site collections
- How to create or update a list item at any site
- How to use dynamic text and HTML templates
- Invite external users to SharePoint Online site
- Manage credentials for workflow actions on site level
- How to move list item attachments to document set
- Query multiple lists across multiple sites and group results
- Send emails with attachments to external users
- Set item level permissions (break role inheritance and assign permissions)
- Use Call SharePoint REST Service instead of standard Call HTTP Web Service
- Use different Get items actions to query lists
- Use Get Items by Query action (REST)
- Deal with deprecation of sandbox code based solutions
Videos
- How to move documents or folders within single site or cross-site
- How to send list item attachments by e-mail
Additional resources
Installation for SharePoint 2013 / 2016 / 2019 / SE
Install
Before installing Workflow Actions Pack ensure that Workflow Manager is configured for your farm. Workflow Manager allows to create and execute SharePoint 2013 workflows. See Workflow Manager configuration guide.
Download setup file and run it on one of the servers in your SharePoint 2013 / 2016 / 2019 / SE farm as Farm Administrator. Follow the wizard steps.
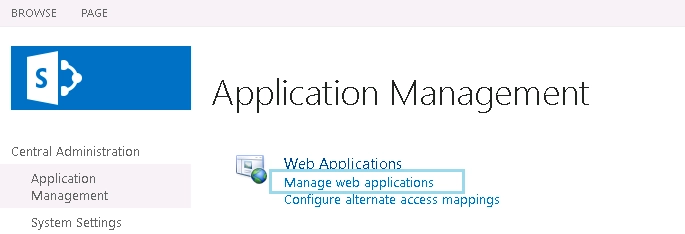
After that you have to activate Web Application level feature Plumsail Auth Service for this please open your central administration site and navigate to Application Management section, click on the link Manage web application, choose your using web application, click to the Features button on the ribbon and activate the Plumsail Auth Service feature.
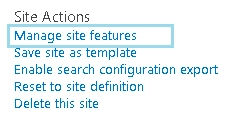
Next, you have to activate feature on your site. Navigate to the site, open site settings and select Manage site features.
Find feature called Plumsail Workflow Actions Pack and click Activate

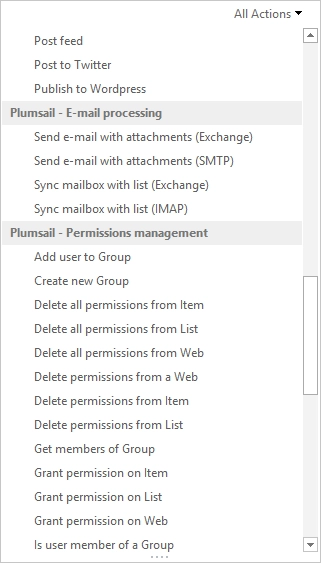
Now, you can find the following actions in SharePoint Designer under Plumsail section
Install license
Buy Workflow Action Pack for SharePoint 2013 / 2016 / 2019 / SE license for each web front-end server.
Download Server ID Generator. You can find download link in the e-mail message with order number from our online store. Run it on WFE server of your farm.
Copy generated keys and send them to sales@plumsail.com . Specify your WFE server names and the order number in the email message.
We will generate licenses for you and will send them to your e-mail within one day.
- Place received .license files in the root folder of all SharePoint web-applications on WFE-servers according to generated keys.
If you use port 80 it is usually here:
c:\inetpub\wwwroot\wss\VirtualDirectories\80\
Uninstall
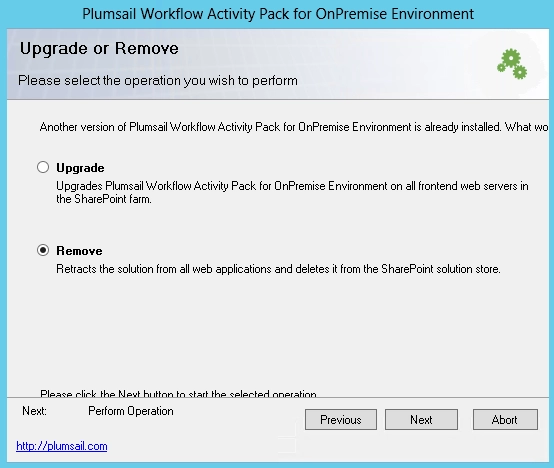
Run setup file and choose Remove, then finish the installation wizard.
To properly remove the application, you need to deactivate Plumsail Action Pack Auth Service feature first on your web application. In the case, when you do not deactivated the feature, you may get the following error: Server Error in ‘/’ Application.. If you received this message on load your site, you may use one of two ways to solving this problem:
Open web.config file (by default this file locate in
C:\inetpub\wwwroot\wss\VirtualDirectories\[Web_App]\web.config) and remove all references to Plumsail.WFServices.Run setup file and install Workflow Action Pack again. Then, deactivate web application feature and try to remove the solution again.
Upgrade
If you have any workflows in state “in progress” that uses the product, please stop Workflow Manager Backend Service on WFE. It will help to avoid workflow interruption.
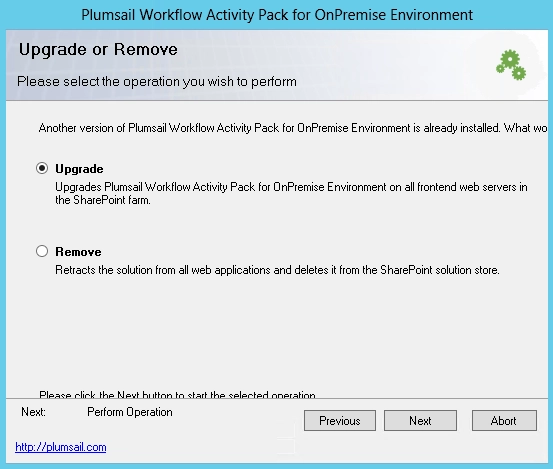
Firstly, you have to deactivate Plumsail Workflow Actions Pack feature at the site level. Download setup file and run it on one of the servers in your Sharepoint 2013 / 2016 / 2019 / SE farm as Farm Administrator. Choose Upgrade and follow the wizard steps.
Find the feature called Plumsail Workflow Actions Pack and click Activate

Manual Upgrade
If you have any workflows in state “in progress” that uses the product, please stop Workflow Manager Backend Service on WFE. It will help to avoid workflow interruption
Download WSP file and save it to C:\temp\ folder on WFE
Please deactivate Plumsail Workflow Actions Pack feature at the site level
Run the following command via SharePoint Management Shell on WFE server:
Update-SPSolution -LiteralPath C:\temp\Plumsail.ActionsPack.OnPremises.wsp -Identity Plumsail.ActionsPack.OnPremises.wsp -GACDeployment -Verbose
Activate Plumsail Workflow Actions Pack feature at the site level
Run Workflow Manager Backend Service on WFE
Upgrade workflows
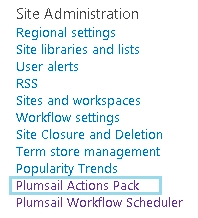
Sometimes after upgrade WSP package, you also need to upgrade your workflows. To upgrade workflows you need to navigate to Site Settings -> Plumsail Workflow Actions and click ‘Upgrade’ button for workflows where you see it. After upgrading of workflows you need to clear Sharepoint Designer cache and open it again. You may need to reopen SharePoint Designer second time, it is specific of SharePoint Designer.
Known Issues
SharePoint Designer issues
SharePoint Designer stores cached workflow actions, that is why after solution upgrade you may need to perform few actions. You need to clear SharePoint Designer 2013 cache, otherwise it can show you the error message because it uses old cached version of workflow actions. To clear cache you need to execute following command from the command line as administrator on your PC and reopen SharePoint Designer:
rmdir "%LOCALAPPDATA%\Microsoft\WebsiteCache\" /s /q
rmdir "%APPDATA%\Microsoft\SharePoint Designer\ProxyAssemblyCache\" /s /q
Or you can download and execute the bat file.
After clearing the cache and running SharePoint Designer you may need to close and open SharePoint Designer one more time, then the error should disappear. We also recommend to install recent updates for SharePoint Designer 2013. This will help to avoid annoying error when configuring workflows.
We also recommend to install recent updates for SharePoint Designer 2013. This will help to avoid annoying error when configuring workflows.
Workflow Actions Pack feature activation issues
If for some reason activation/deactivation of Workflow Actions Pack feature is failed via SharePoint user interface you can try to activate/deactivate it via PowerShell.
Workflow Actions Pack feature ID is
22bb2cee-2403-4b7c-818e-9078b11a218b
Use this ID in the next command with Force flag
Enable-SPFeature -identity 22bb2cee-2403-4b7c-818e-9078b11a218b -URL https://somesite -f
Also you can disable the feature using the command
Disable-SPFeature -identity 22bb2cee-2403-4b7c-818e-9078b11a218b -URL https://somesite -f
Note
You can find more information about the PowerShell commands in the Microsoft documentation.